
 Hello everyone!
A couple weeks ago I saw (this) bag and instantly knew two things, I had to have that bag and that I didn’t want to pay over a hundred dollars for it. So I made it! I went to Target (never lets me down) and found the perfect bag for this DIY. It was on sale for 10.99! SCORE! For the trim I went to a upholstery store in my hometown. The trim was 21.99 a yard which is kind for pricy but they had a huge selection, so you can really personalize your bag how ever you please. It took just under a yard and a half. So to have a similar bag to the one I wanted it cost me a whopping $42.00.
So here’s what you’ll need:
- scissors
- thread to match your trim or thin fishing line
- a blunt tip needle
- pins
- your choice of trim
- a raffia bag or straw bag
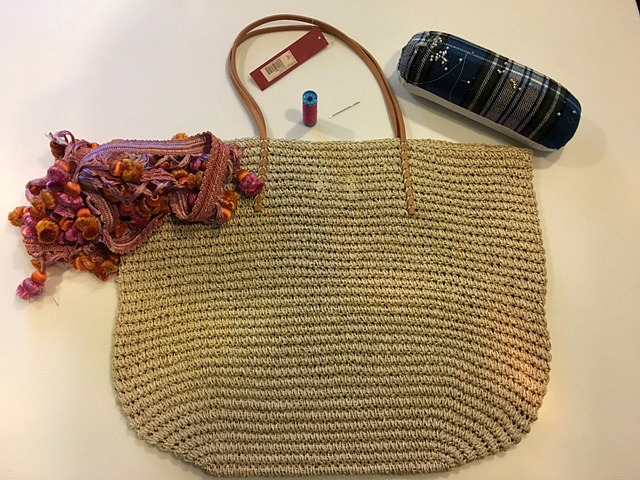
First thing you want to do once you have all your materials is to pin the trim to the opening of your bag.

(My favorite “helper” helping me)
Once you’ve pinned your trim down and cut the trim to the length of your of your bag, your going to start sewing! Below is how I sewed the trim on.


Make sure to catch both the raffia and the trim with your needles with each stitch – you can put your needle through a loop of the raffia as pictured above. You are going to want to sew both edges of the trim (top and bottom) to hold it in place. Then VOILA! You have an adorable beach bag!

This bag was super easy and fun to make. I hope this post helps you in your future crafting adventures!
Thanks for reading!
Emily

I love it! It’s so cute! Easy to follow instructions. Now I need one
LikeLiked by 1 person
This is gorgeous! I love the way it turned out.
LikeLike
Thank you so much!
LikeLiked by 1 person
Love this! It is so much less expensive than the $121 bag, and it turned out even prettier! ❤️
LikeLike
Thank you!
LikeLiked by 1 person